

Introduction
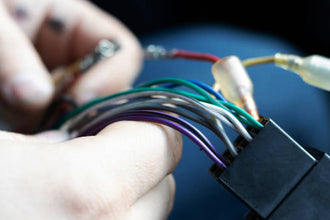
Testing car wiring with a multimeter is a valuable skill for any DIY mechanic or carenthusiast. It allows you to diagnose and troubleshoot electrical issues in your vehicle quickly. In this comprehensive guide, we'll walk you through the steps to test car wiring using a multimeter effectively.

Step 1: Gather Your Tools and Safety Precautions
Before you begin, it's essential to gather the necessary tools and take safety precautions:
Tools Needed :
- Digital multimeter (with probes)
- Wiring diagram or service manual for your car
- Safety glasses and gloves
Safety Precautions:
1. Always disconnect the car battery before working on electrical systems.
2. Use insulated tools to avoid electrical shocks.
3. Work in a well-ventilated area to prevent exposure to exhaust fumes.
Step 2: Understanding Your Multimeter
Before diving into testing car wiring, let's understand your multimeter's basic functions:
-Voltage(V): Measures electrical potential in circuits.
-Resistance (Ω): Checks for continuity or breaks in wires.
- Current (A):Measures electrical flow through a circuit.
Step 3: Testing for Continuity
Continuity testing helps identify broken or disconnected wires in your car's electrical system:
1. Turn off the car's ignition and disconnect the battery.
2. Set your multimeter to the resistance (Ω) setting.
3. Place one probe at one end of the wire you want to test and the other probe at the opposite end.
4. If the multimeter shows a reading close to zero ohms, the wire has continuity (it's intact). If it displays OL (open loop) or a high resistance value, there's a break in the wire.
Step 4:Testing for Voltage
Testing for voltage can help diagnose power-related issues in your car's wiring:
1.Reconnect the car battery and turn on the ignition (if necessary).
2. Set your multimeter to the voltage (V) setting.
3. Insert the red probe into the wire's exposed end.
4. Place the black probe on a known good ground, such as the car's chassis.
5. Read the voltage displayed on the multimeter. If you have the expected voltage, the wire is working correctly.
Step 5: Locating Wiring Problems
To pinpoint wiring problems, follow these steps:
1. Use a wiring diagram or service manual to identify the wire you want to test.
2.Disconnect any connectors or components related to the wire.
3. Test for continuity and voltage at various points along the wire to locate the issue.
4. Repair or replace the damaged section of the wire if necessary.
Testing car wiring with a multimeter is a valuable skill that can save you time and money on car repairs. Remember to prioritize safety by disconnecting the battery and wearing protective gear. With practice, you'll become proficient in diagnosing and fixing electrical issues in your vehicle, keeping it running smoothly.